Lightning fast, continuous localization. Decent quality. Super affordable. All automated with no humans in the loop.
This guide shows you how to build a multilingual product on autopilot using Crowdin. The workflow is tech stack agnostic and suitable for web, mobile and desktop applications, as well as their documentation and marketing materials.
Best of all, AI translations would be contextual. The AI will have all the information it needs to produce the best possible translations. And in the future, you would still be able to bring in a human linguists to improve translations, if you needed to.
Prerequisites: You have an internationalized web or mobile application. This means that all translatable texts from the UI have been extracted into the resource files. The implementation time of this guide is 30 minutes.
Looking for a Complete General Guide?
Create Crowdin Account
Visit the Pricing page, find the Free plan option, and click Get Started to sign up for a free plan.
While Crowdin offers a generous free plan, you may need a paid plan for content-heavy projects.
Create Translation Project
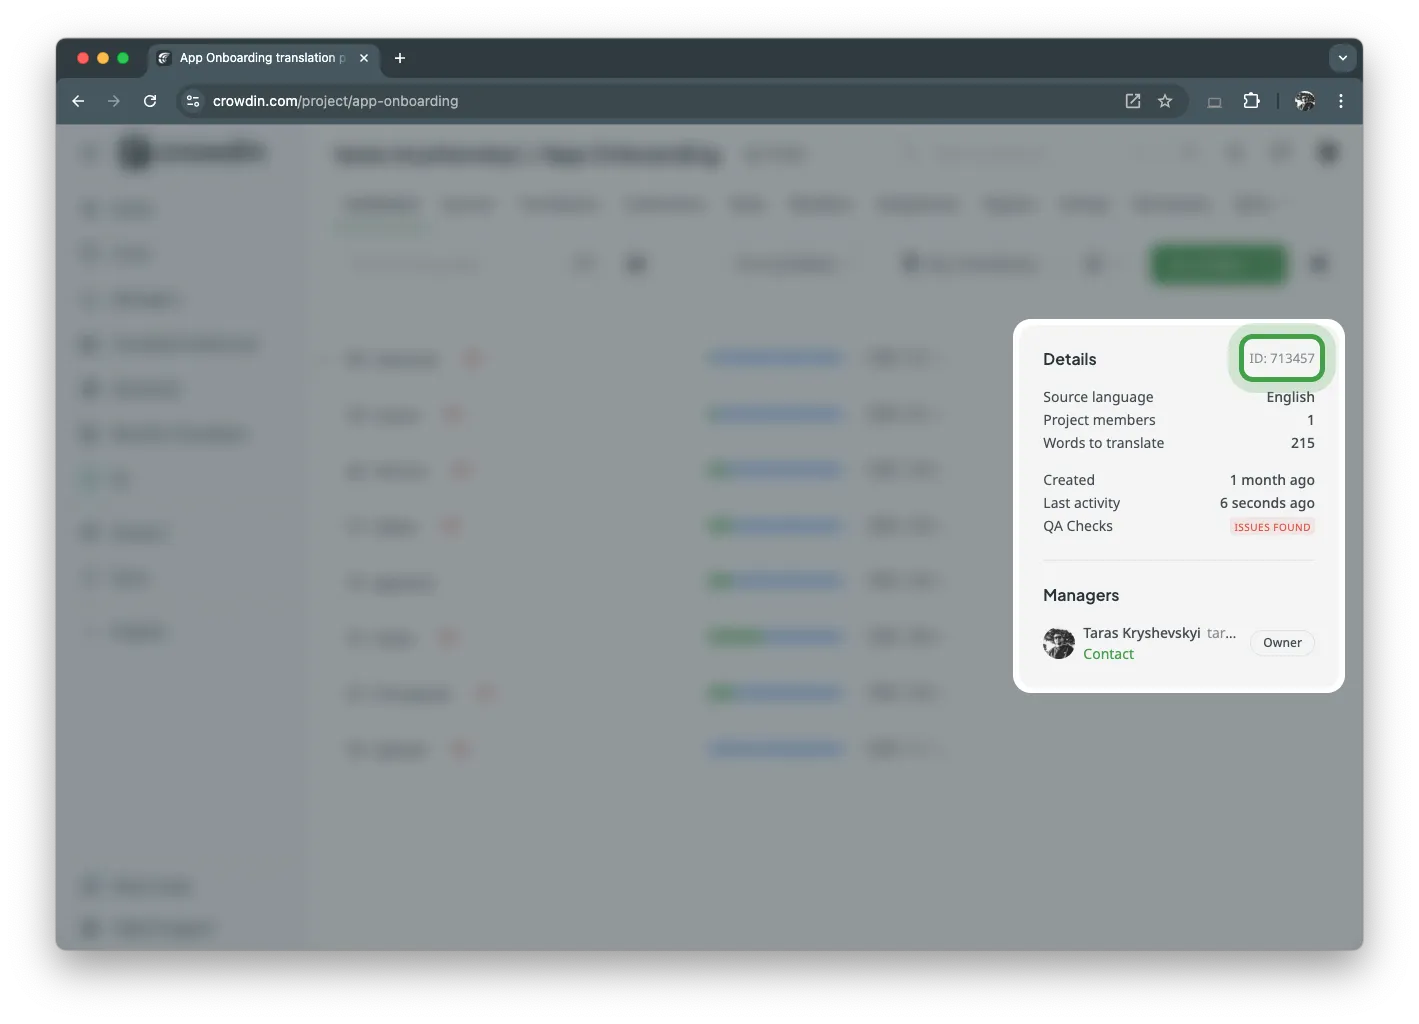
The Crowdin project is just like a Git repo but for translation files. To create one, visit this page. Once you have completed this step, you should find a Crowdin project ID and save it.

Configure AI Provider and the Prompt
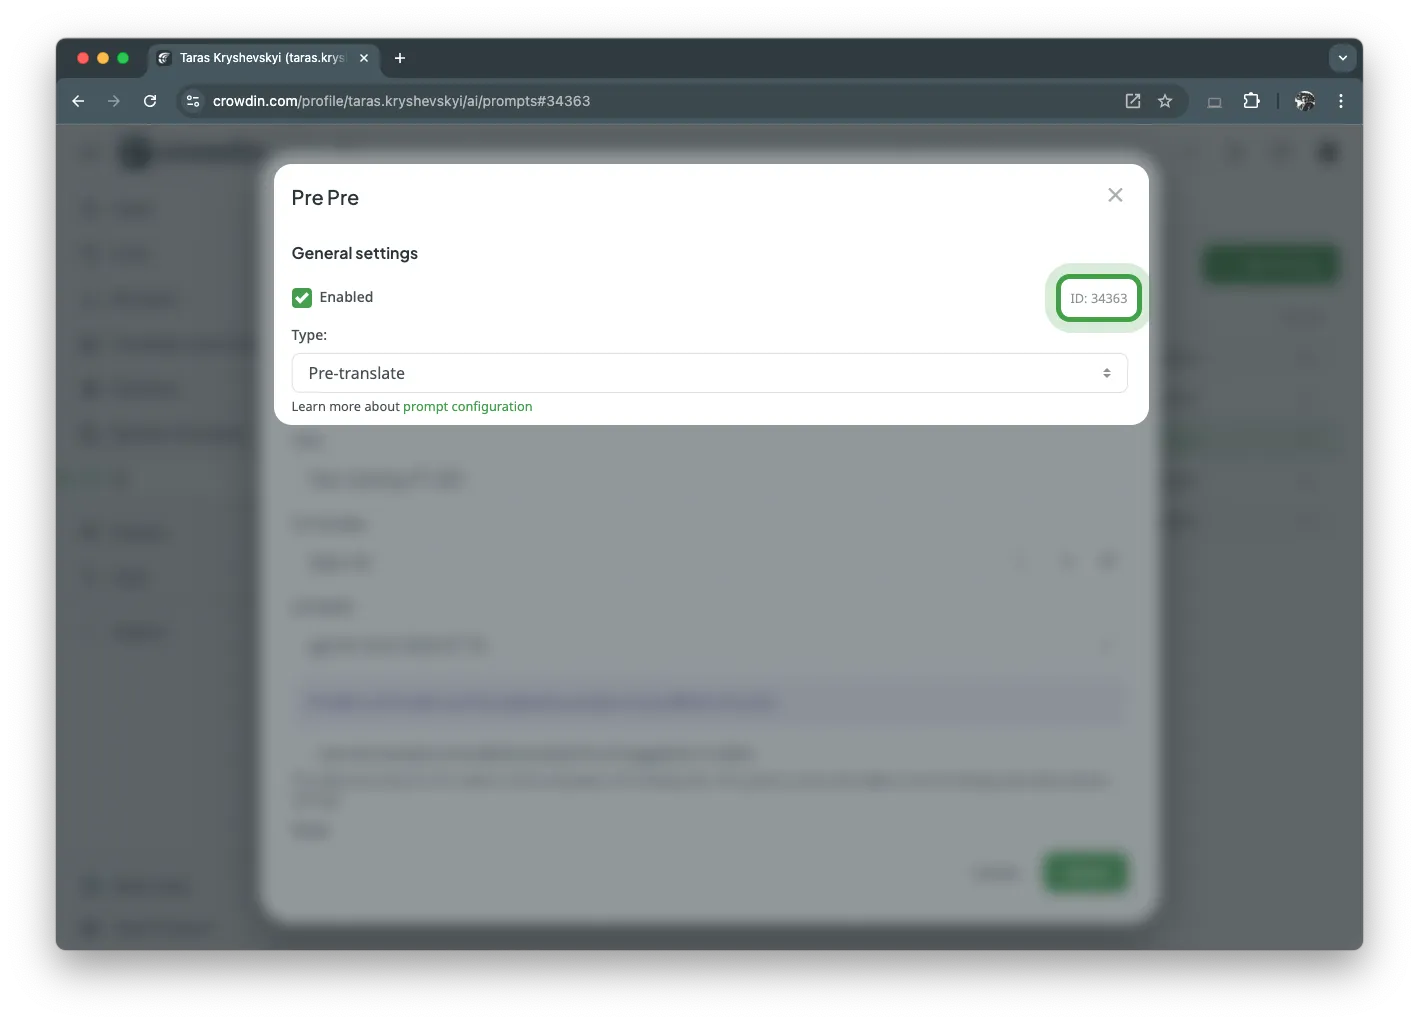
Please follow the quick start guide to configure AI in your Crowdin account. Once completed, you will be able to find a Prompt ID, which is needed for the next step in this guide.

Install CLI tools
On your computer, you would need the Crowdin CLI to create a crowdin.yml configuration file that describes where source and translated files live.
npm i -g @crowdin/cliContext Harvester is another tool needed to read your code and find helpful contextual information for each text that needs to be translated.
npm i -g crowdin-context-harvesterConfigure ENV Variables
Both CLI tools would require CROWDIN_PERSONAL_TOKEN and CROWDIN_PROJECT_ID variables to be set to authenticate and communicate with Crowdin. Visit the Settings -> API page to create a personal API token.
Crowdin CLI would need
Projectsscope. Context Harvester would require theProjectsandAIscopes.
Store the personal Auth token in the ENV variables:
export CROWDIN_PERSONAL_TOKEN="xxxxx"export CROWDIN_PROJECT_ID=xxxxxxConfigure Crowdin CLI
We recommend placing crowdin.yml at the root of your repo. It’s needed during the initial setup and ongoing CI/CD localization.
Run the following command to initialize crowdin.yml:
crowdin initThe command will create crowdin.yml in your work directory. Here’s what a simple config might look like:
preserve_hierarchy: true
files:  - source: "/locales/**/*"    translation: "/%two_letters_code%/%original_file_name%"
Edit the source and translation properties in the files section or add more objects if you have multiple sets of localization files. For more advanced configurations, please refer to the Crowdin CLI documentation.
Upload Source Files
Now it’s time to do the first upload of your translation resources to check the connection and configuration.
Add the --dry-run option to preview what files will be uploaded to Crowdin:
crowdin upload sourcesExtract Context from the Code
Context harvesting is only relevant for UI copy localization. You can proceed to the next step if you are translating .md or .html files.
Both AI and human linguists struggle to translate short UI labels when given only a resource file (e.g., key-value JSON). To improve the expected translation quality, it’s recommended to use one or more of the context-providing tools that Crowdin offers. In this tutorial, we will show you how to use the Crowdin Context Harvester, which reads the code and tries to extract useful contextual information about each key that needs to be translated.
Configure Context Harvester
Context Harvester CLI does not require a config file. Run the following command in the project root directory to configure the actual extraction command:
crowdin-context-harvester configureThis command will guide you through setting up the necessary parameters for the harvest command. After answering the questionnaire, you will be presented with the command you can use to perform the context extraction.
Extracting Context
The output of the previous command might look like the following:
crowdin-context-harvester harvest\ --token="<your-crowdin-token>"\ --project=<project-id>\ --ai="openai"\ --openAiKey="<your-openai-token>"\ --model="gpt-4o"\ --crowdinFiles="*.json"\ --output="csv"\ --concurrency=10Running the above command will create a crowdin.csv file. This file will contain all the extracted contextual information that a CLI was able to find. You can review the CSV or upload it to Crowdin with no review. If you run this command locally, it’s a good idea to check the quality of the context extraction, see if there’s a way to improve the prompt, or even edit the context manually if possible.
Upload Context to Crowdin
The crowdin.csv can be uploaded to Crowdin by running the following command:
crowdin-context-harvester upload -p <project-id> --csvFile=<csv-file-name>See the Harvester repo to learn more about its configuration and advanced use.
Other ways of providing context for localization projects are Screenshots, context applications, and context request workflow.
Translate Content
Use the prompt ID created at the beginning of this guide and run the pre-translate command to have your content translated:
crowdin pre-translate --ai-prompt=xxxLearn more about the command and the different options you can apply to improve the outcome. For larger projects, we recommend setting up a CI/CD localization workflow.
After the initial translation you might want to check your Crowdin project to verify translations are complete and see if you want to adjust Crowdin project settings, like automatic QA checks.
Download Translations
Run crowdin download to download translations.
crowdin downloadLearn more about the download translations command.
Continuous Localization
To make Crowdin part of your product development cycle and translate new content as it’s created, you’ll need to repeat the last 4 steps in your CI/CD. Basically:
- Upload the latest source files every time they are changed;
- Extract context;
- Translate;
- Download translations;
Find out more about Crowdin Github Action and Crowdin CLI in CI/CD pipelines.
Contact us if you need more information, or if your AI translations require human proofreading to improve their quality, please choose a vendor.
Localize your product with Crowdin
Diana Voroniak
Diana Voroniak has been in the localization industry for over 4 years and currently leads a marketing team at Crowdin. She brings a unique perspective to the localization with her background as a translator. Her professional focus is on driving strategic growth through content, SEO, partnerships, and international events. She celebrates milestones, redesigns platforms, and spoils her dog and cat.
