In the previous posts of the Enterprise 101 series, we’ve looked around your new workspace and now move to another exciting aspect of our new product – fully customizable and automated project workflows.
A workflow maps out the content journey within each Crowdin Enterprise project. It consists of the set of steps the source text should go through to get localized. Workflows help achieve more automation and build custom localization scenarios for each project separately. So you can adjust the localization process to all teams and departments involved, as well as all the types of localizable content, and products you build multilingual.
Let’s give workflows on the Crowdin Enterprise a closer look, discuss the basics, and focus on some popular use cases.
Anatomy of a Workflow on Crowdin Enterprise
Each workflow consists of the following components.
Steps
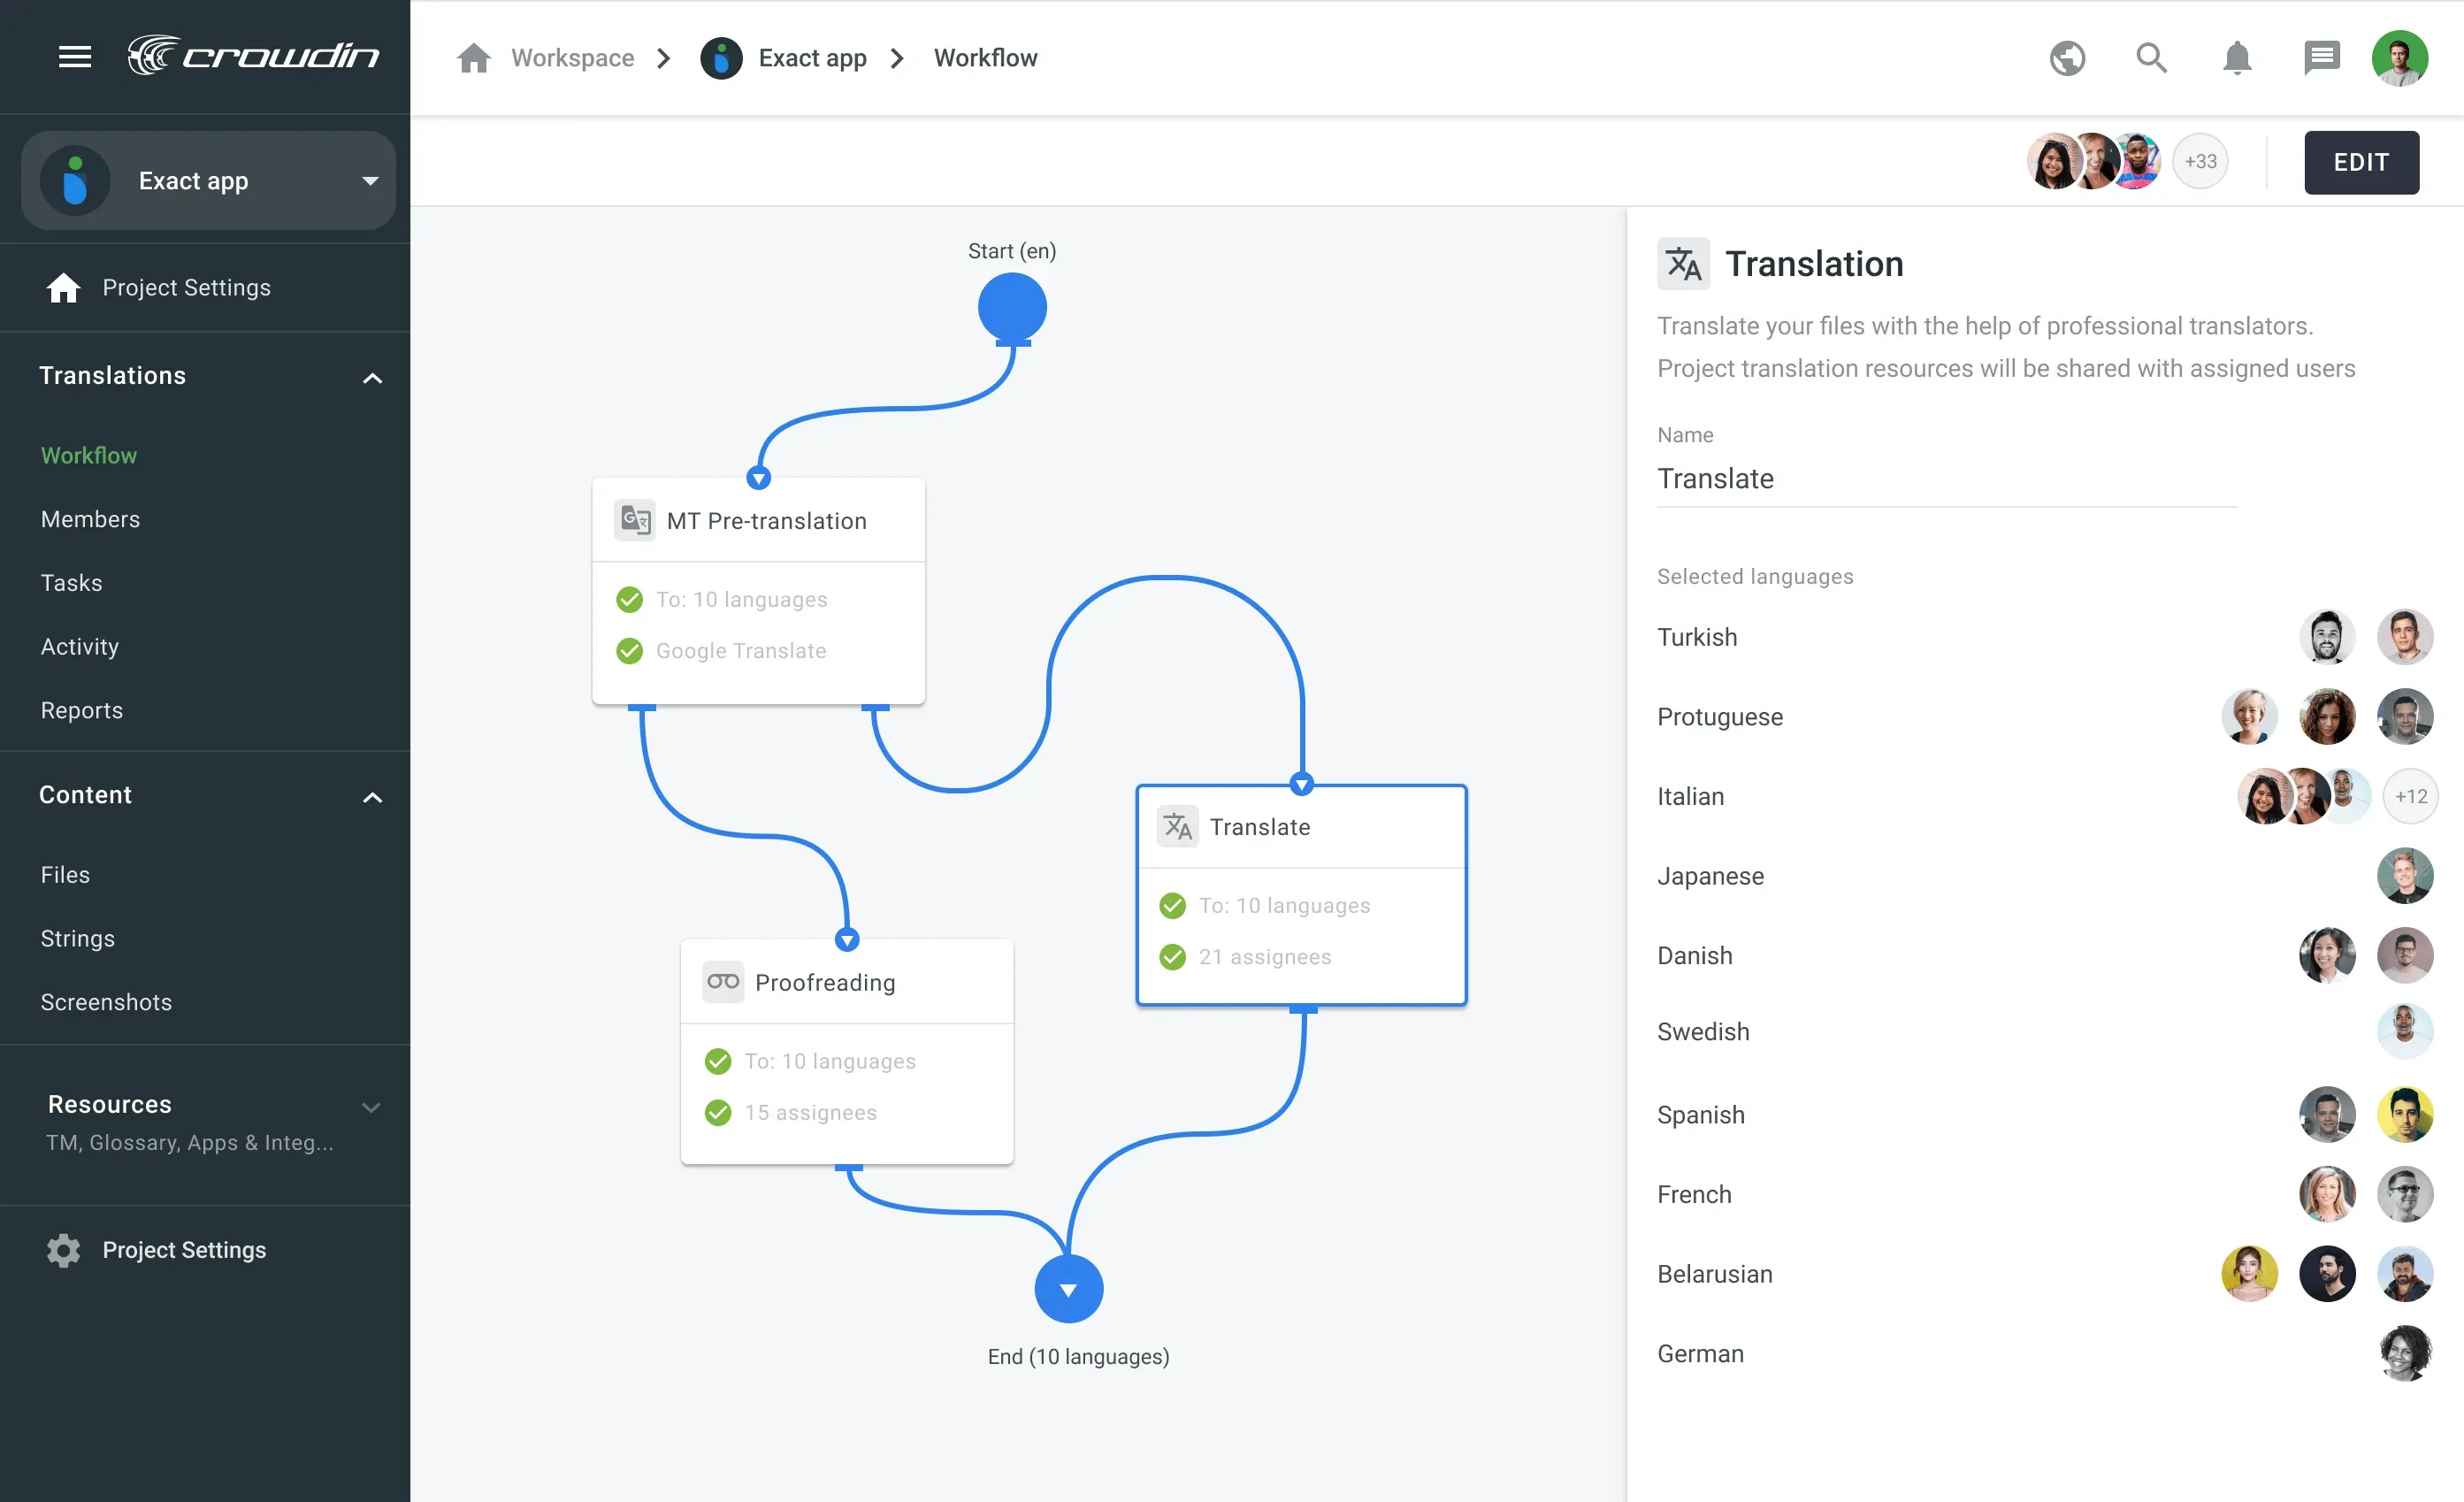
A workflow can consist of one or multiple steps. There’s no cap on workflow steps you can apply within each workflow. They can be connected both in parallel or subsequently. For example, you can pre-translate content with the existing Translation Memory, and then send translated strings to a Proofreading step while the untranslated ones will be directed to the Translation step.
Source and Target Languages
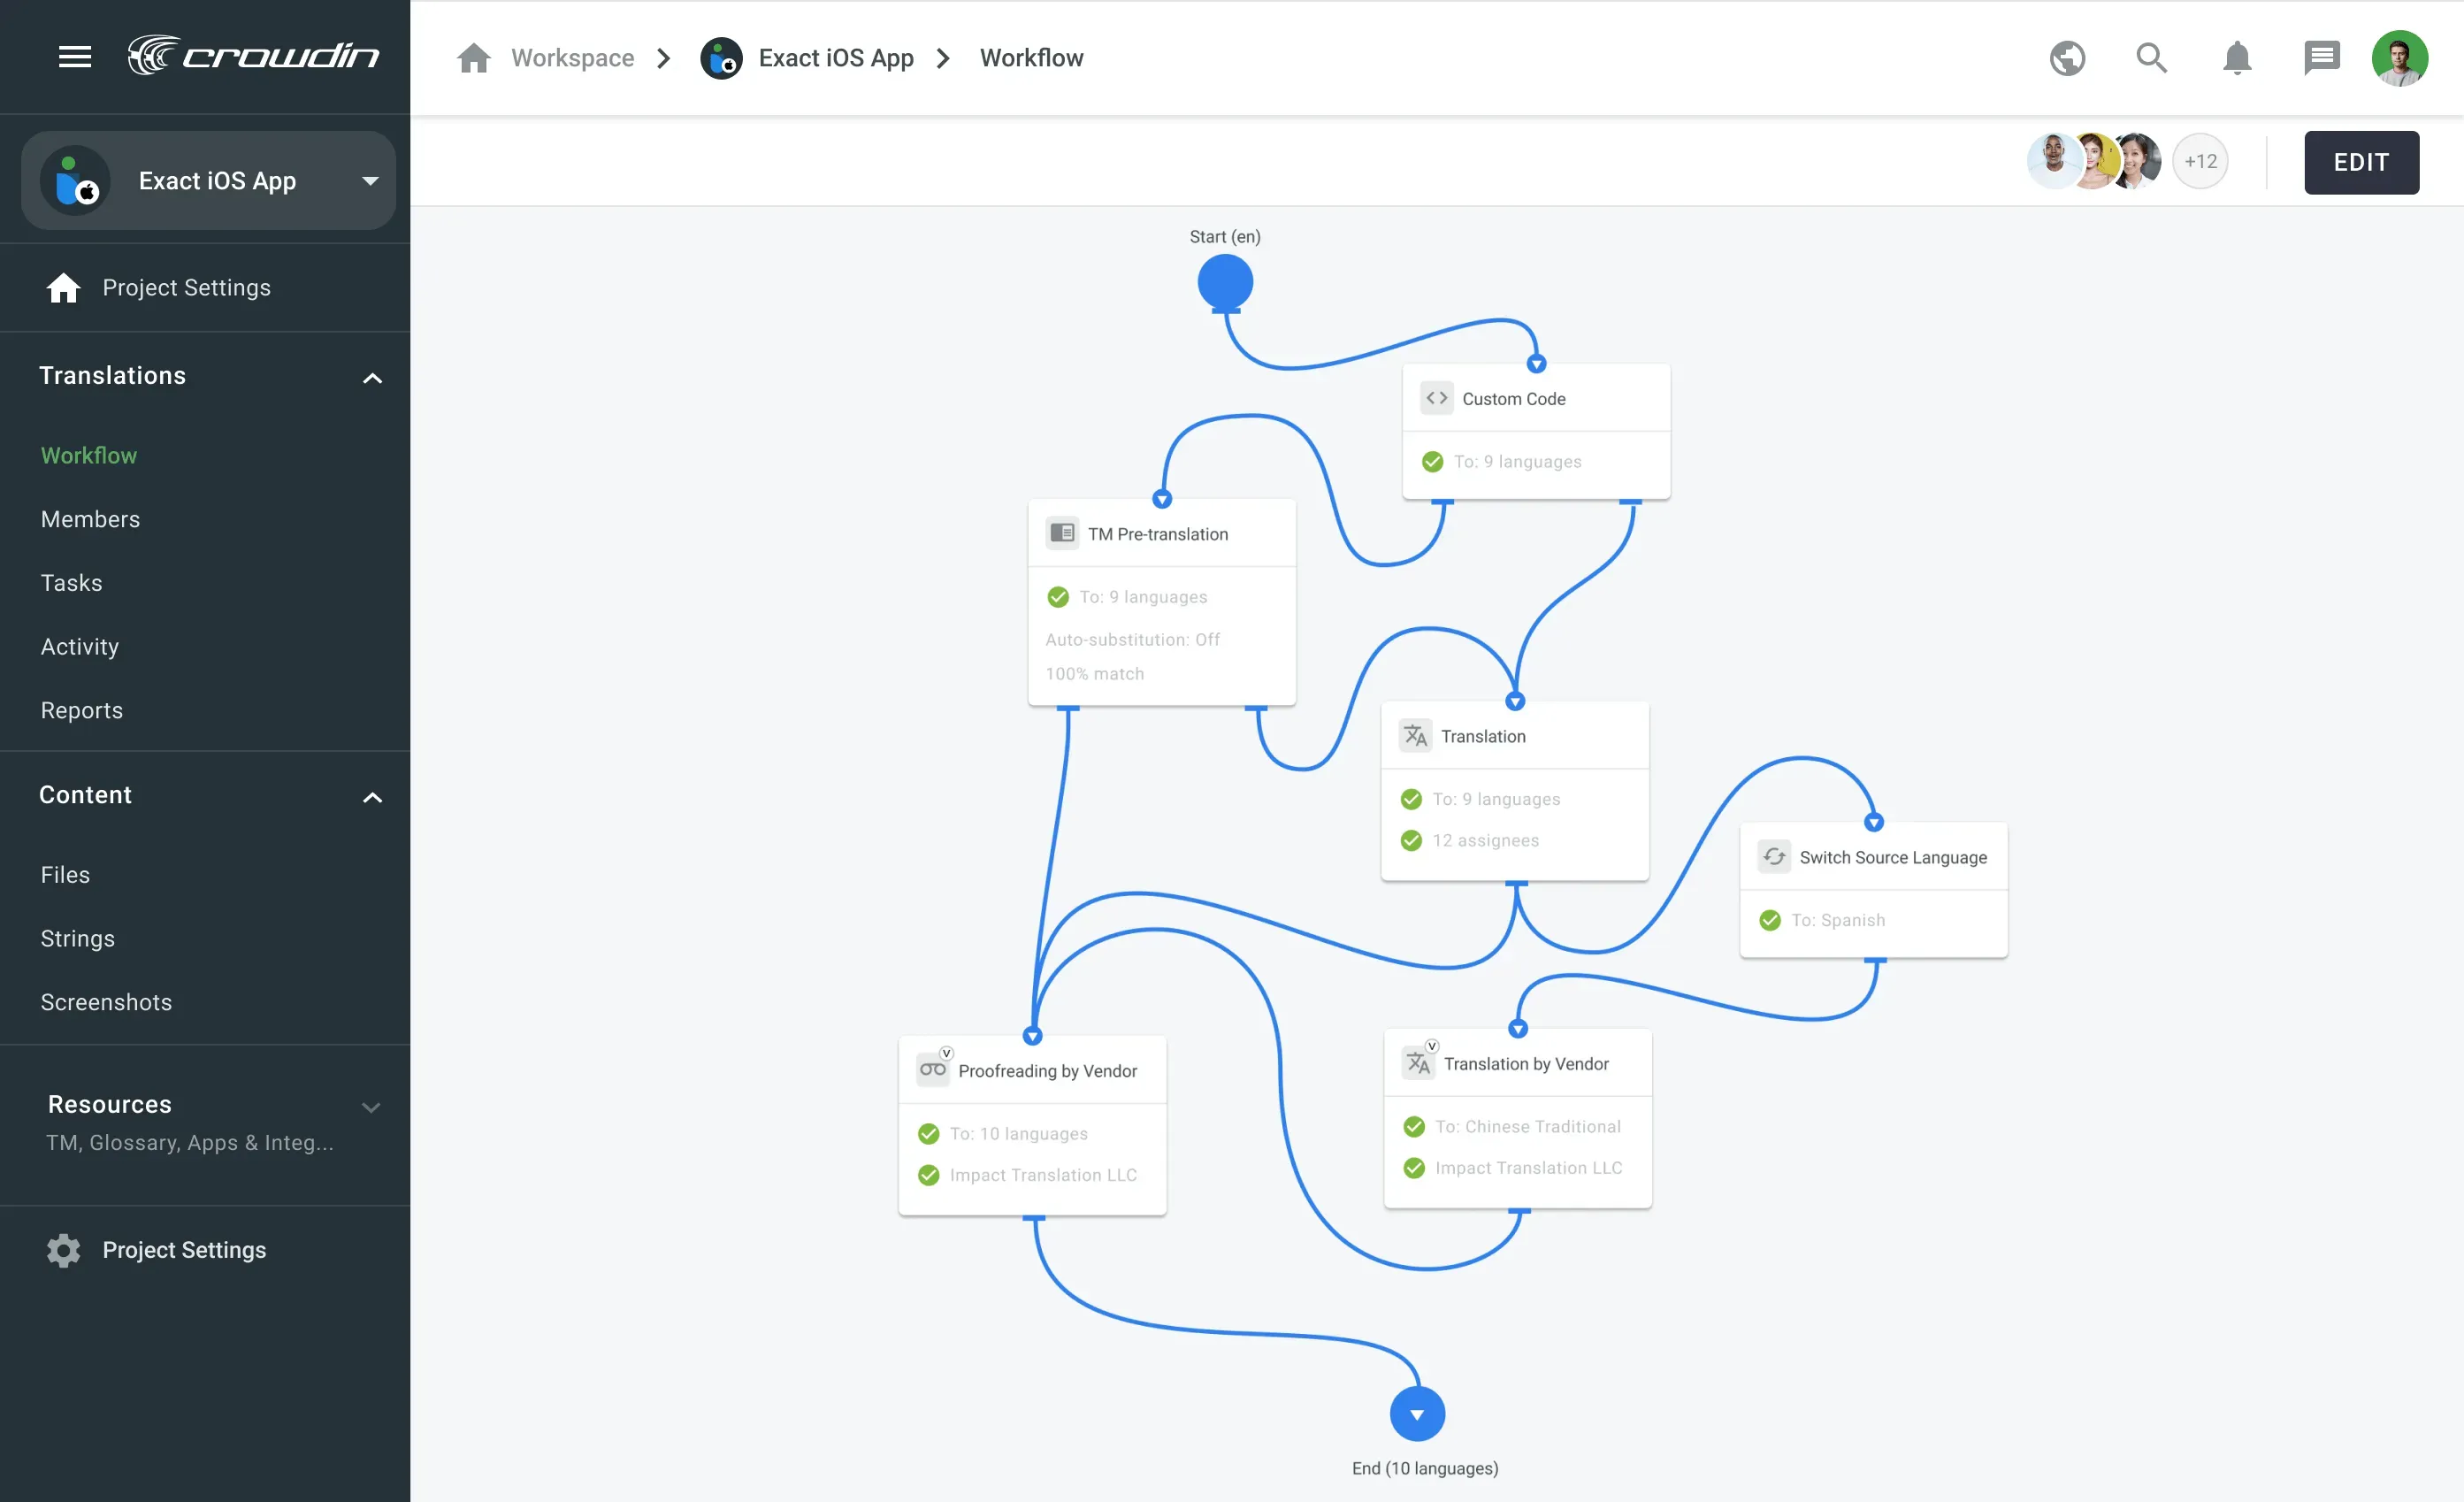
Each step has one source language and an unlimited number of target languages. On the Switch Source Language step you can change the language you’re translating from. This should help tackle translation between less common language pairs.
Assignees
On Crowdin Enterprise you can apply different translation methods. Combine them, use one after the other, or in parallel. Each Translation or Proofreading step will have its assignees – your in-house translators, freelancers. You can create Teams to assign a group of people to a workflow step at once.
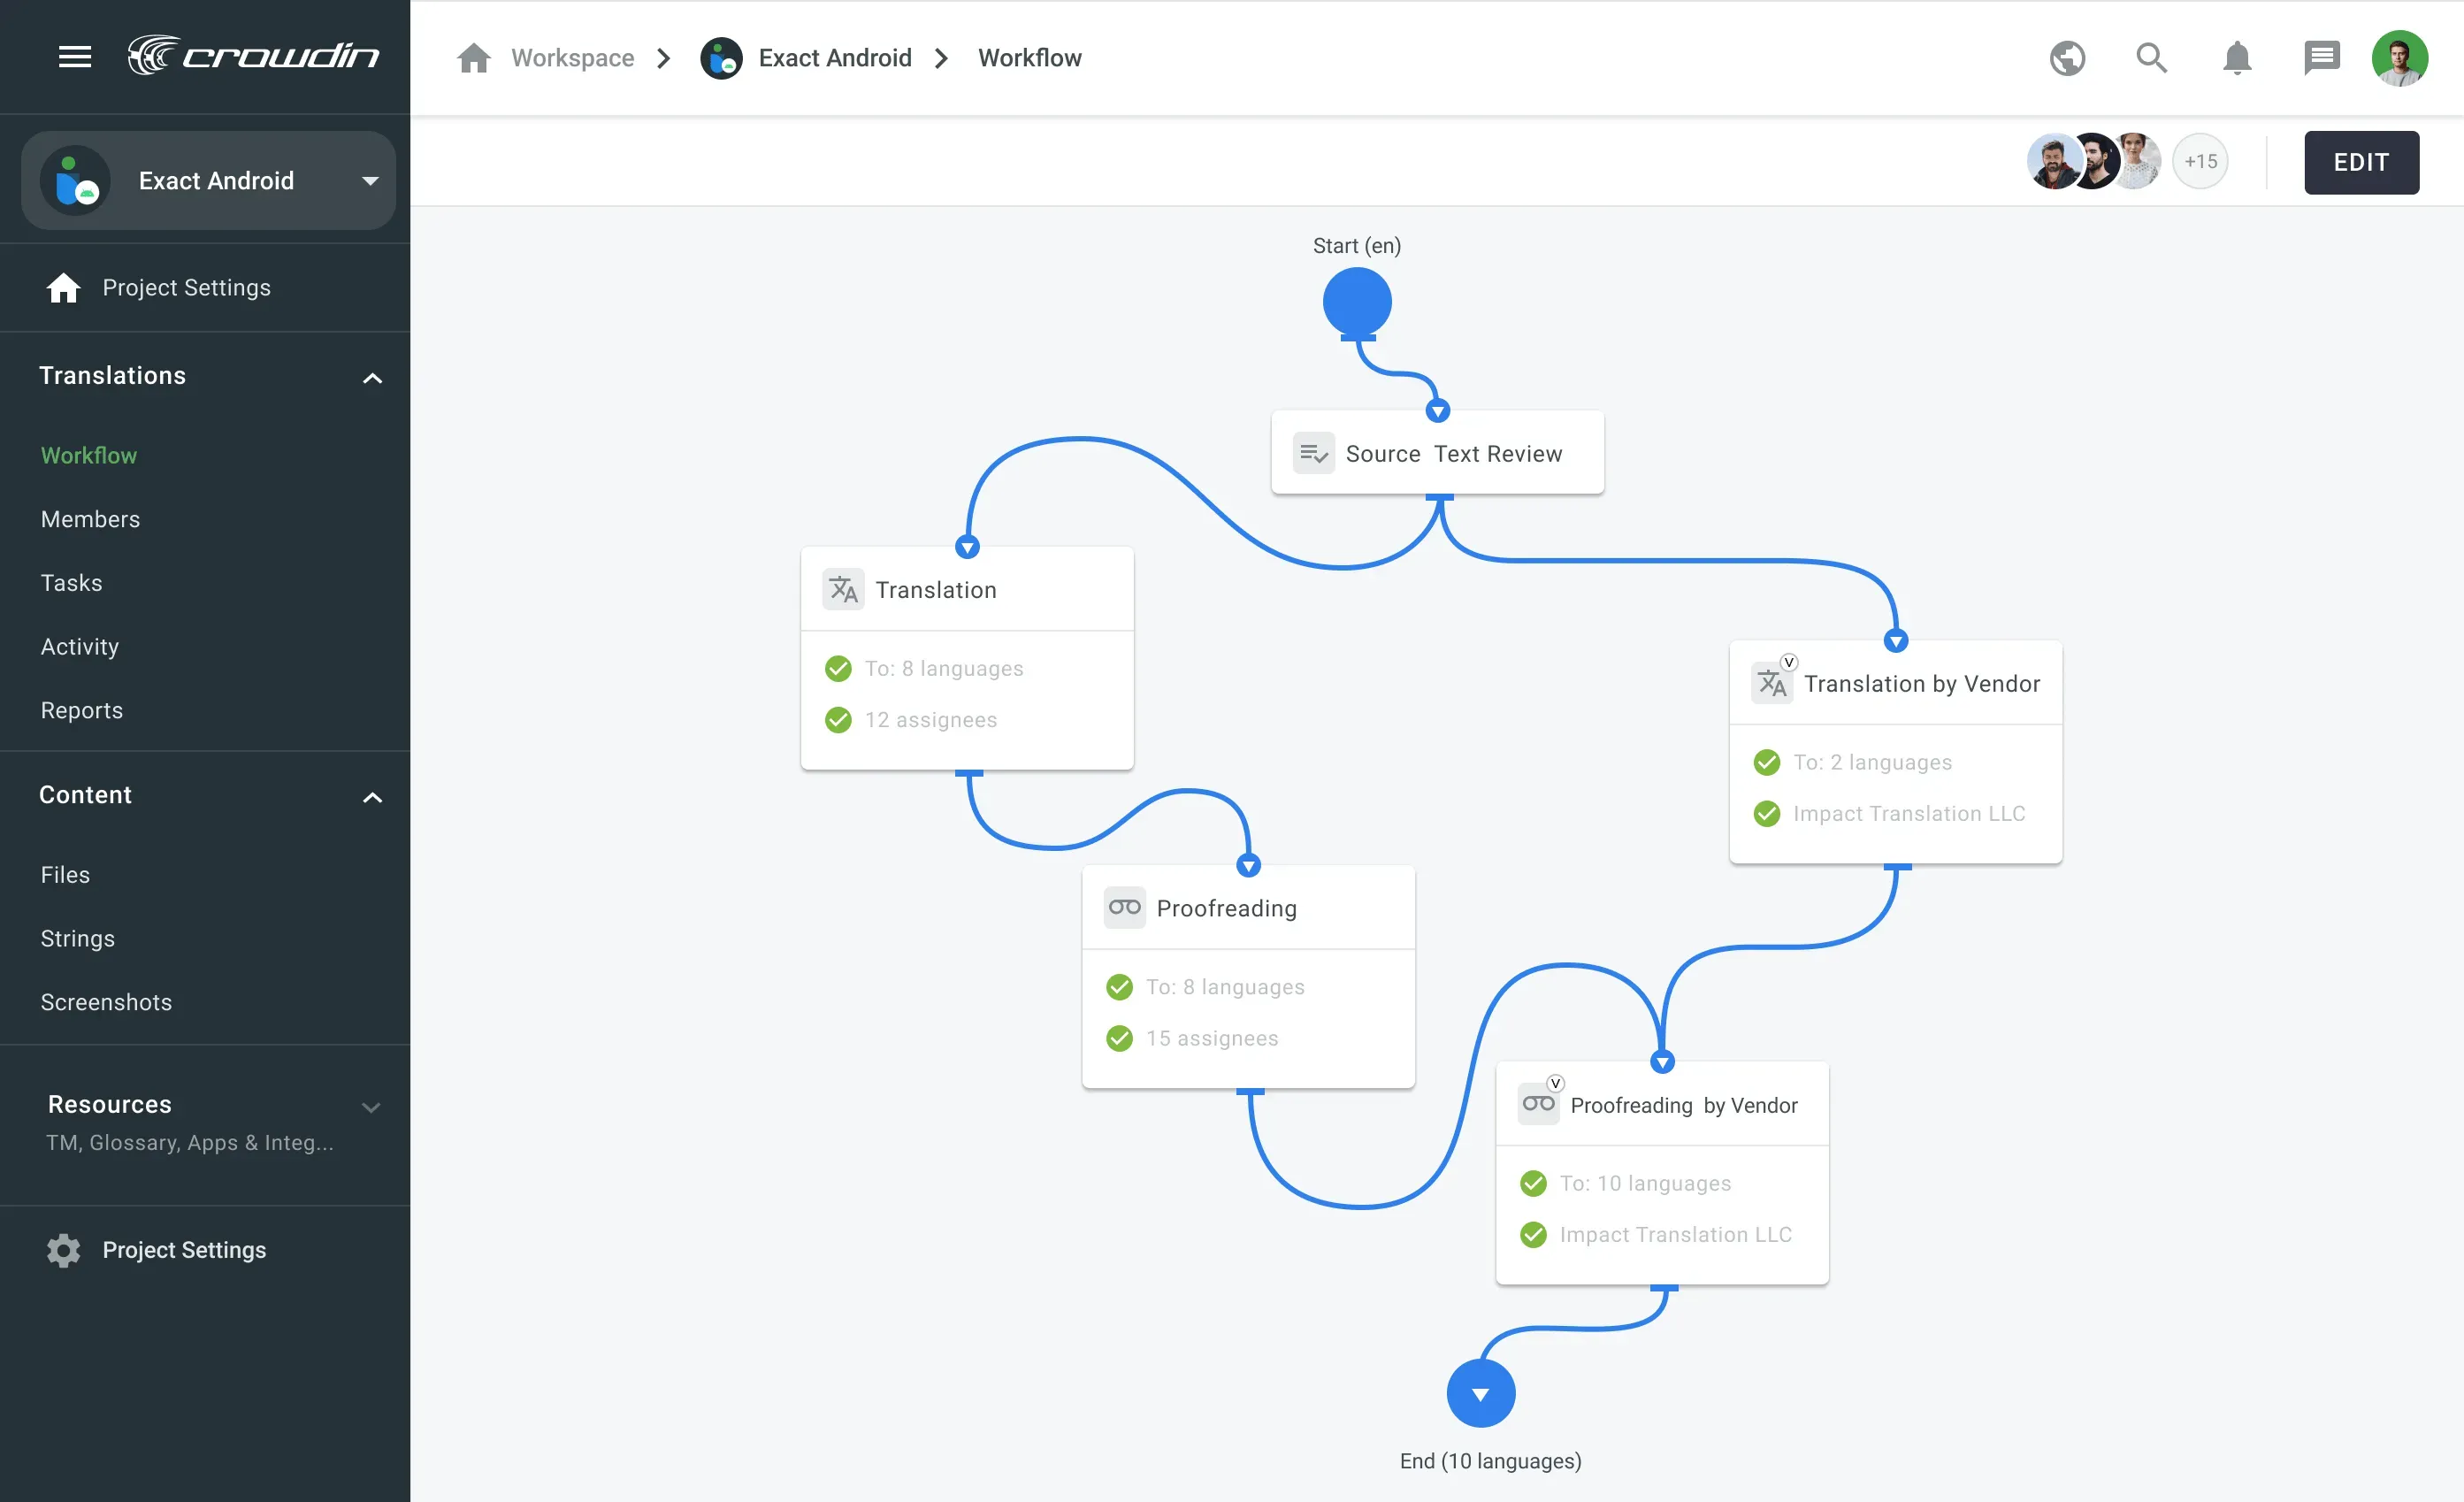
If working with a professional translation agency, add steps Translation by Vendor and/or Proofreading by Vendor, and assign an agency. Vendors will receive a secured copy of the defined step in their incoming projects.
Assigning Workflows to Projects
There are several ways you can assign a workflow to a project. These include choosing an existing workflow template, modifying a template, and creating a new workflow.
Workflow Templates
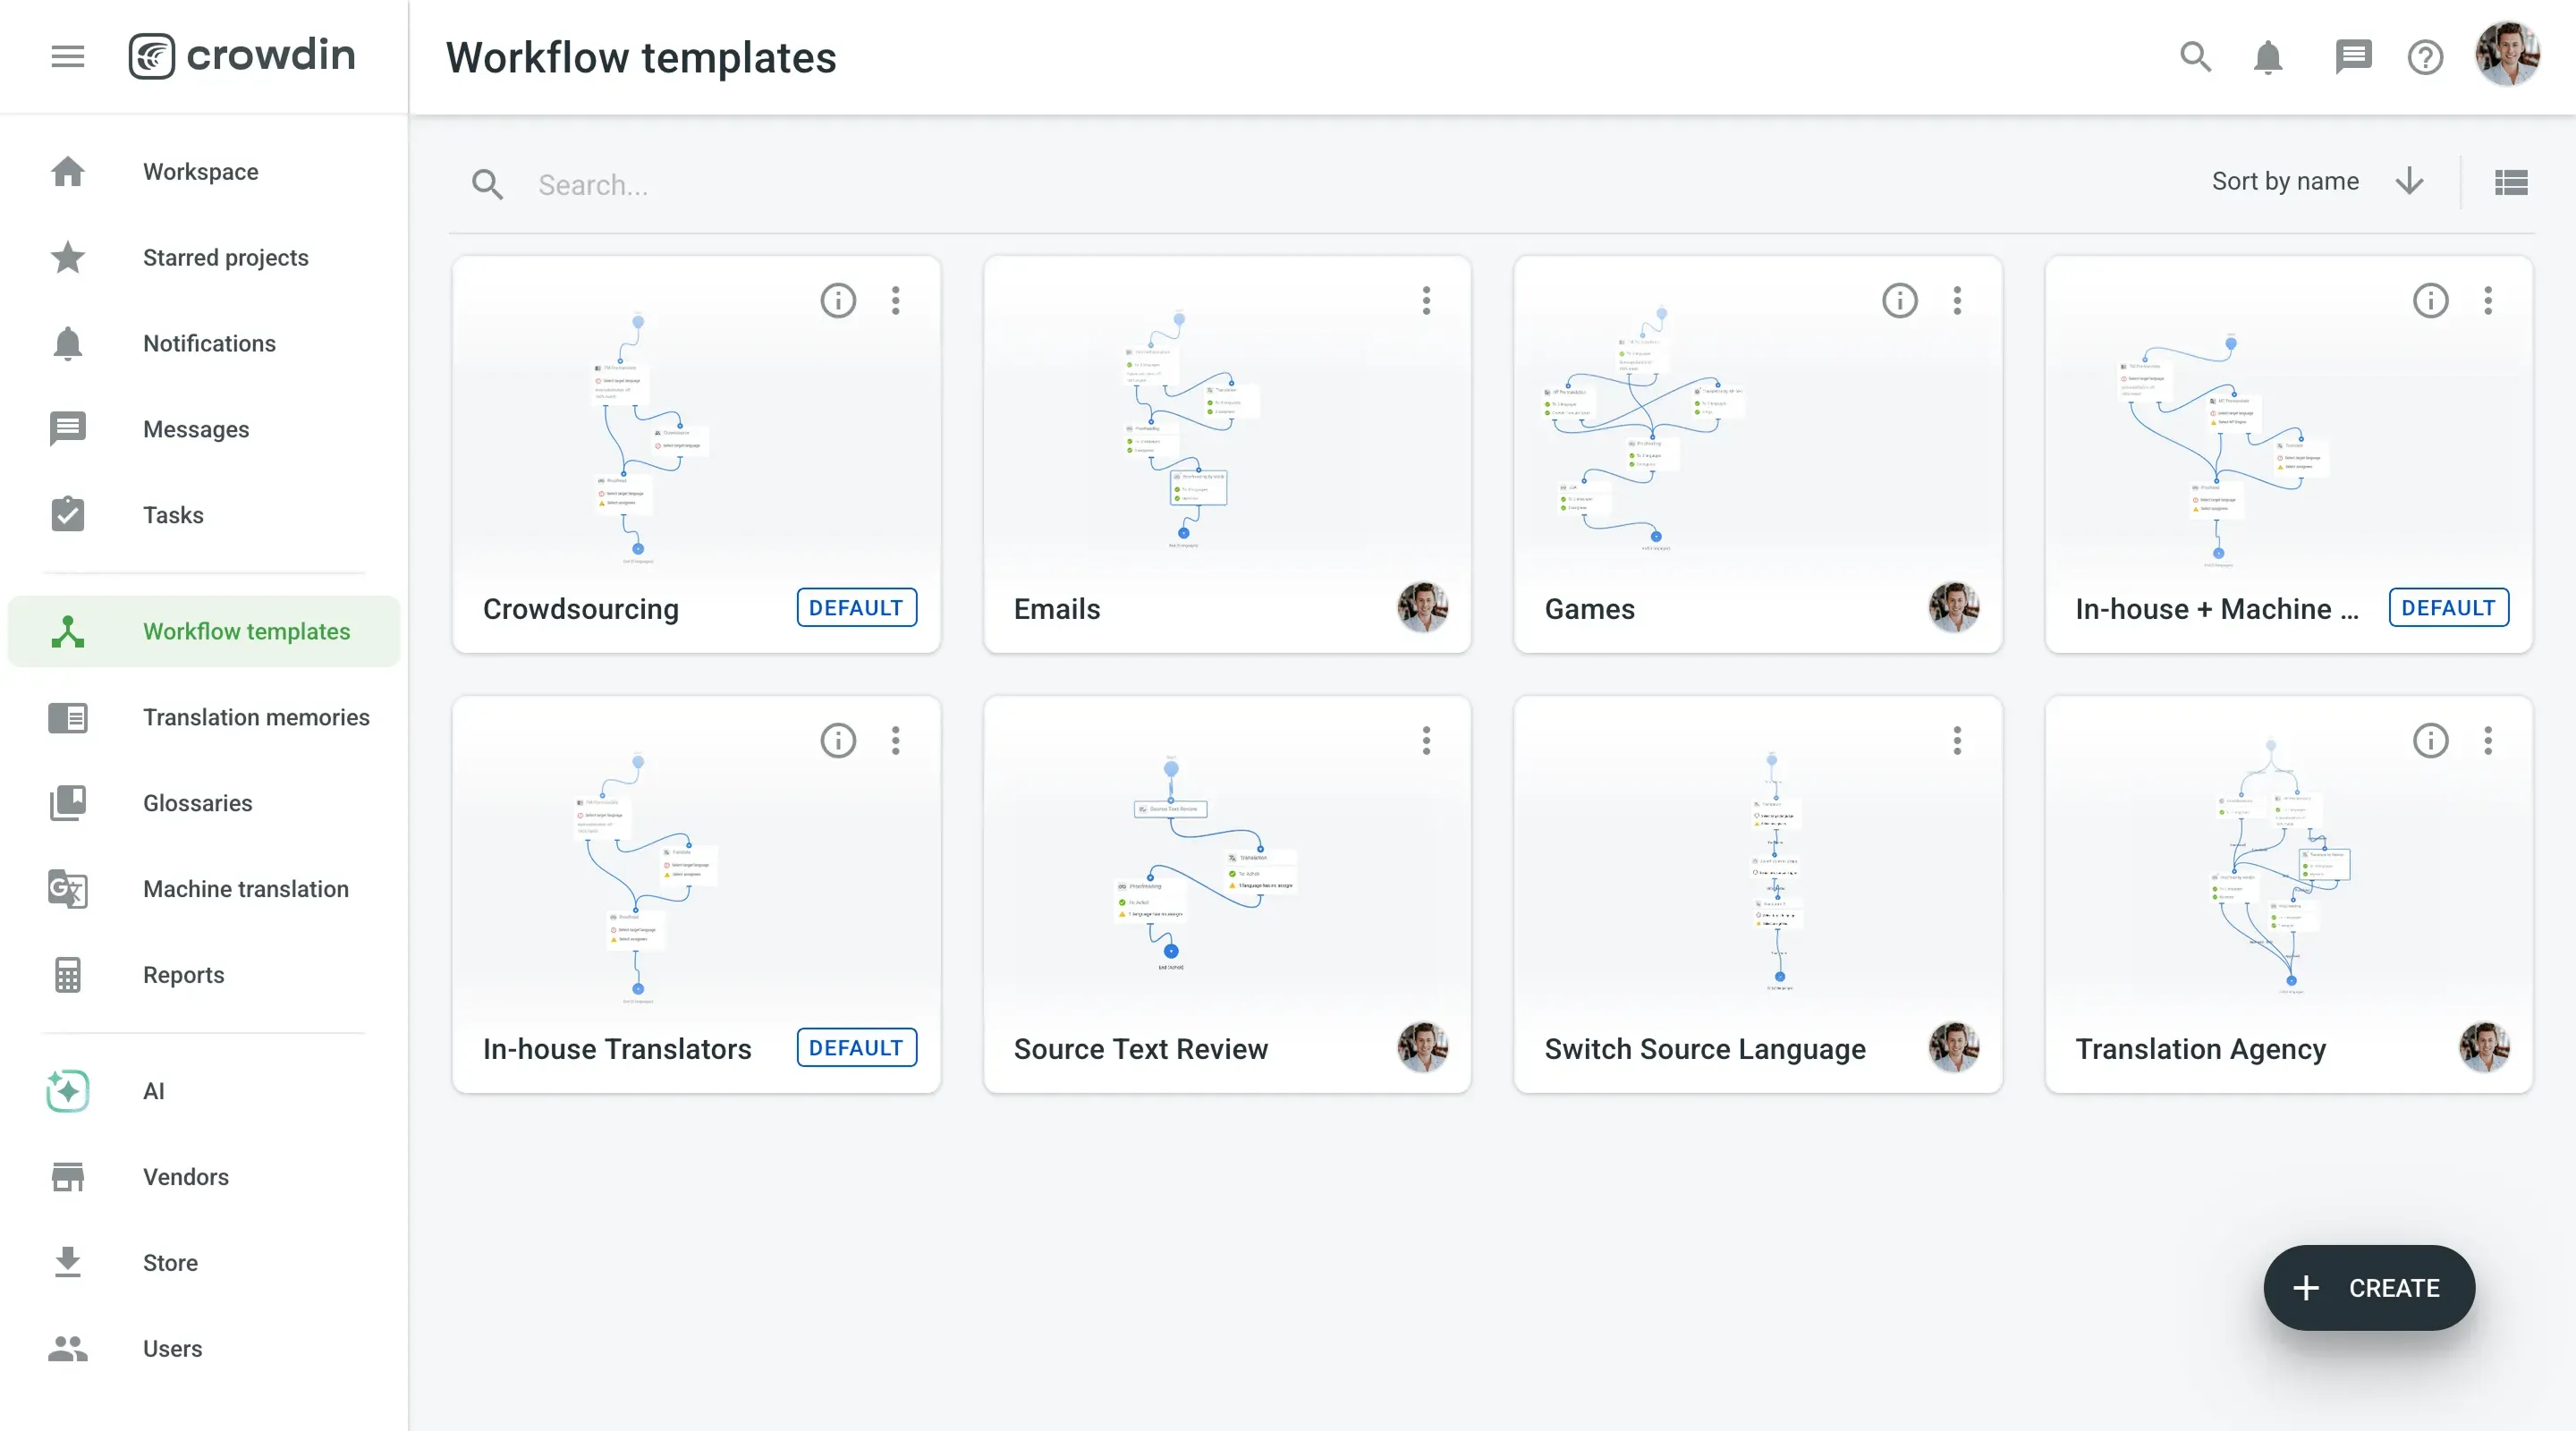
If there are typical patterns in how your localization processes are organized, create workflow templates. Add templates for localizing different products, content types, or any other criteria. You can also use default templates or create new ones on the organization, group, or subgroup level. You’ll be able to modify them for each project separately after assigning them.

Workflow from Scratch
Creating a new workflow allows you to adapt the localization process to the project needs and the ways you prefer to translate or review your content. You’ll work in the intuitive workflow editor. Drag-and-drop the necessary steps, set connections between the steps, choose assignees, and target languages. That’s it!
Use Cases
Whenever you create a project on Crowdin Enterprise, you will need to assign a workflow to it. There are tons of ways you can organize localization within each project. Here are some common use cases.
Simple Workflow to Get Translations Fast
Use a minimum number of steps to get results quickly. For example, you can create a workflow with only 3 steps: MT Pre-Translation to leverage machine translations fast, Translation if anything remains untranslated after the pre-translation step, and Proofreading to review results. This simple workflow will help get translations done ASAP.

Workflow with Multiple Proofreading Cycles
To ensure the high quality of the translations, you can add as many proofreading steps as you need. We advise to always proofread translations provided by your community or generated by the Machine Translation engines. A good practice is to use one translation vendor for translation and the other for proofreading.
There’s also a Source Text Review step that allows you to make sure only valid copy moves further along the workflow and gets translated.

Workflow with a Custom Code and Different Translation Vendors
To work with different translation vendors simultaneously, you can add multiple Translation by Vendor or Proofreading by Vendor steps and assign different organizations to different languages.
You can also add a Custom Code step that allows you to divide the content flow from a single step into two, based on the criteria you need. For example, you have two folders in your project containing texts from front-end and back-end. And you want the first being translated by a vendor, the other by your in-house translation team. Ask your developers to create a simple JavaScript code, and upload it to the step in a click. This way you will be able to set up different routes for your content.
Or you might want to make sure short phrases won’t go to the Translation Memory Pre-Translation step and want them to be translated by human translators only. The Custom Code step will help you arrange that.

Next Step?
To make sure you use Crowdin Enterprise to the fullest and know how to customize it for your company’s needs, request a demo with our tech manager. During 30 minutes we’ll give you and your team personal consultation on how to use the new product. You’ll learn how to get the best results with the least effort and maximum speed.
Iryna Namaka
Iryna Namaka has vast experience in content creation for different spheres and different tech products. She loves to create a clear and consistent brand voice for products that are used globally.
![Introducing Project Workflows [Crowdin Enterprise 101 Series]](/blog/_astro/CE_workflows_cover.BwW4uJlx_Z2rvTJh.webp)